Wysiwyg Editor + Copy/Paste
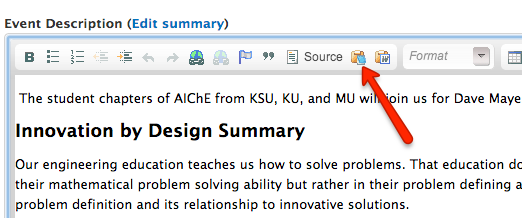
Before we get started learning how to add new content, it's important to mention one very important thing. The body sections of any content type requires that you style the content you enter to make it look its best. You do this using the editor, which looks similar to Microsoft Word. However, it is NOT the same. You can learn more about proper styling later but the most important points to remember are:
When copying and pasting from elsewhere, always:
- Paste using the text icon

- Remove all formatting like bullet points, etc before pasting. If you want bullet points, you can then reset them using the editor.
What Makes Events & Announcements Different?
Events Once one event is created, an event listing page is automatically created along with a menu navigational link. This page will show all upcoming events and below those, past events. Once an event passes, it will shift on this listing page from upcoming to past. See example
You don't have to do anything as it is all based on the event date.
Announcements Did one of your members recently receive an award that you want to shout out on the site? Did your officers change? You can create an announcement. When you create one, it will stay live on the site for 60 days and appear on the home page feed. If you'd like it to appear for a longer time (or shorter time), you can adjust this!
Creating an Event
To create an event, click on Post Content and then Event (community).

Complete Fields
Once you click on the web page content type, add content to the following fields:
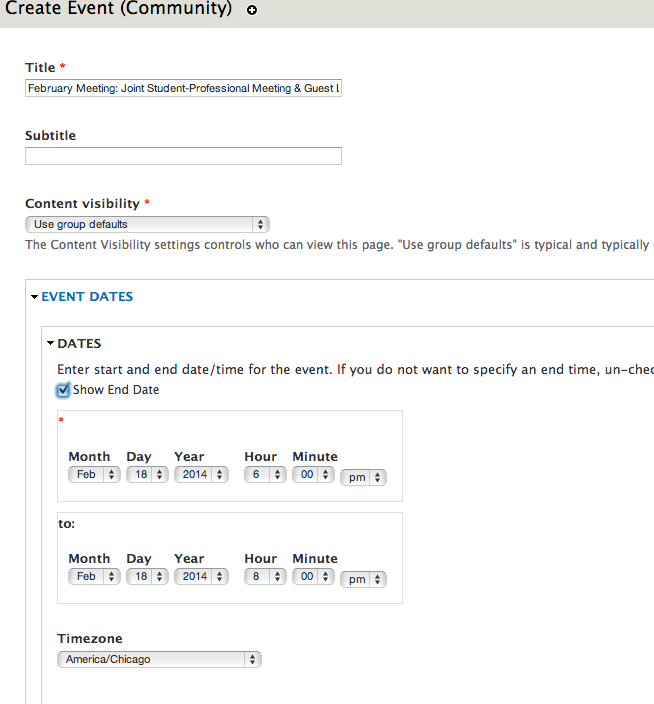
- Title - This appears at the top of the content.
- Subtitle - (optional)
- Content Visibility - The default setting is public, which is desired most of the time, especially if you have a navigational link. If you want the content to be seen only be members of your community, select Private - accessible only to Group Members.
- Event Dates - Currently, you must put in a time. We are working on a solution where you can announce an event and add specific times later. If you're not sure of the exact times of the event, uncheck the "Show End Date" box. You choose an approximate starting time and mention that times are tentative. Ideally, you will have the exact start and end time before adding an event. Note, you may choose to add an announcement if you know only the date and not the time.
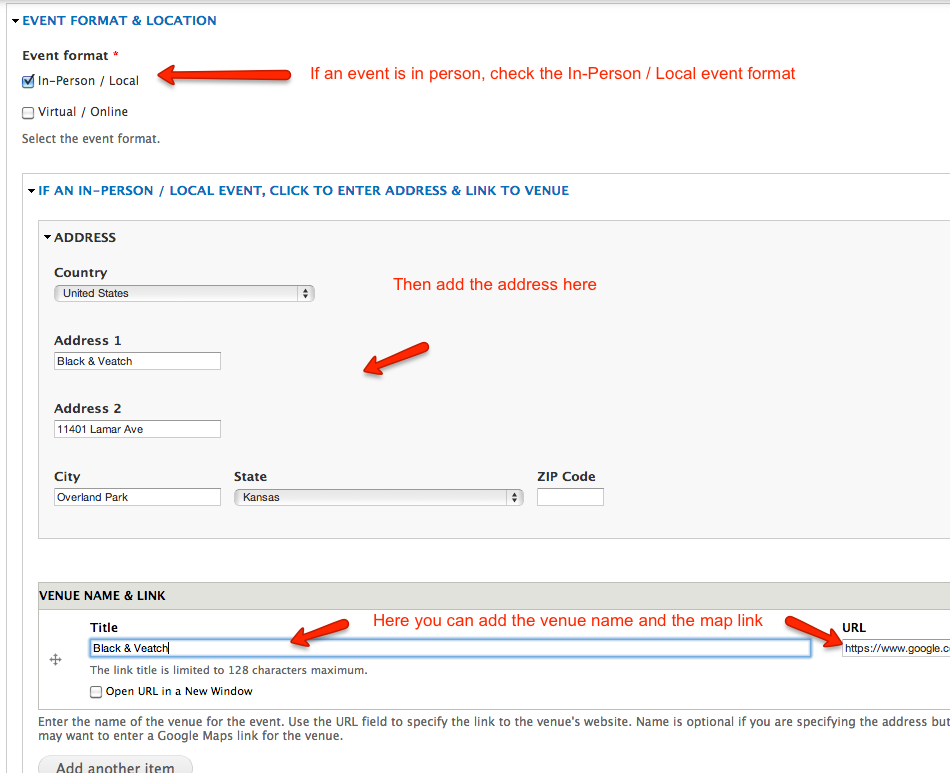
- Event Format & Location - Is your event an in-person event or virtual. You can add location and links here.
In-person event detail
Virtual event detail

- Related Profiles - (optional) You can reference the profile of a presenter, speaker, or organizer as long as they are an AIChE member. We encourage you to use this feature and ask profile owners to complete their profiles.

- Event Description - This is where the bulk of your content will be added. You can type directly into the field (recommended) or paste using the text paste icon. Review style guide for best results
- Images & Files - (optional) - You can add images and files to an event as well. Learn how
- Tags - (optional)
Click save to publish the event.
Need to embed Paypal code in an event?
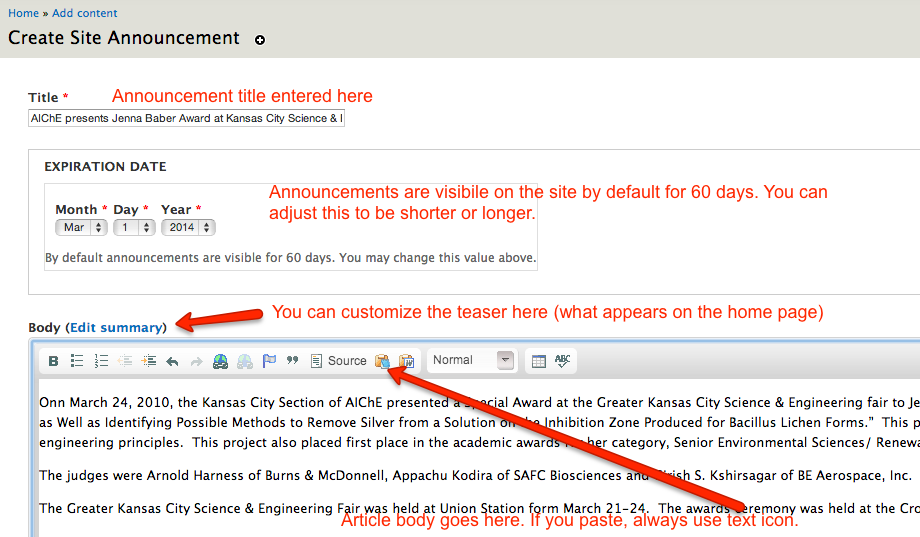
Creating an Announcement
To create a site announcement, click on Post Content and then Create Site Announcement.

Once in, add the title in the title field and the announcement itself in the body field. Announcements stay visibile on the site for 60 days by default. They will then be in the system but not visibile. You can always change the visibility date to be longer or shorter. Once you've added the title, visibility date, and body of announcement, click save. The announcement will then appear on the home page feed. Click the image below to learn more.